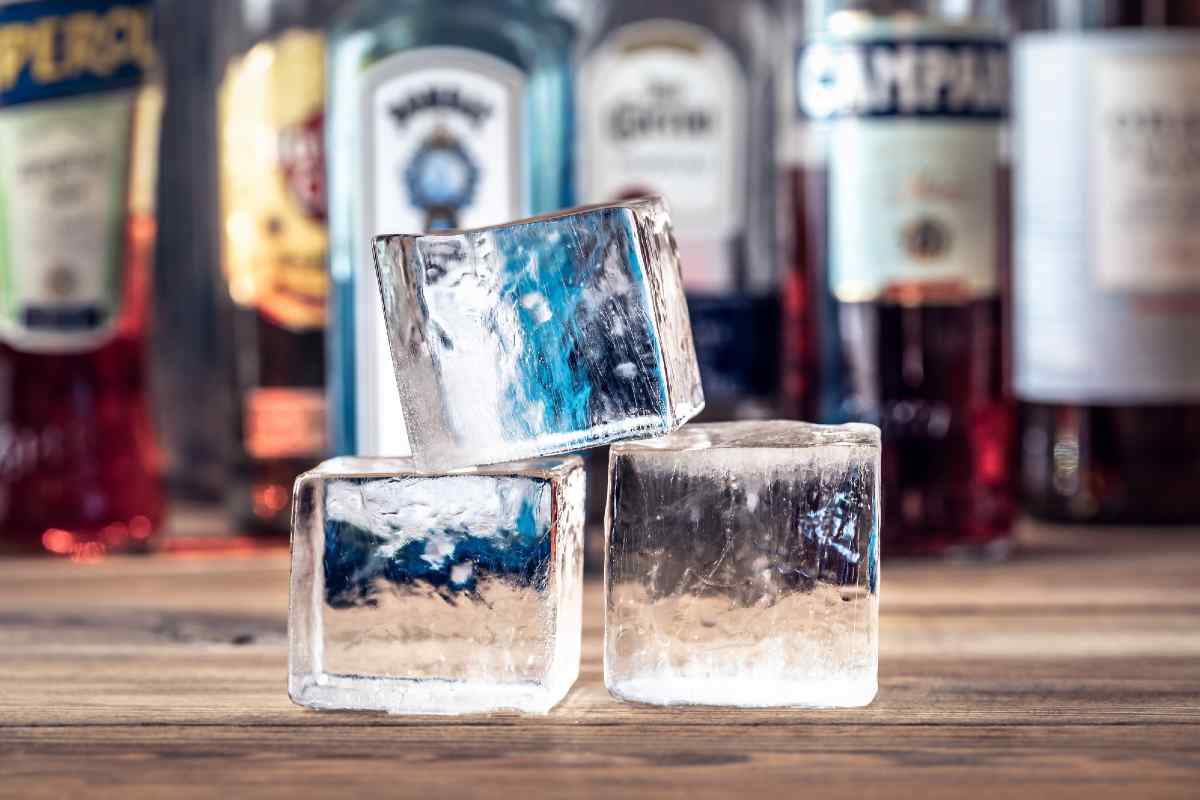
In fancy cocktail bars, you often have your choice of huge cubes for your Old Fashioned, hand-carved spheres over which your Japanese whisky is poured, or a tall pillar placed in your Collins glass. But how do they get their ice so clear and large, and how can you make it at home?
Most ice machines only make cubes up to 1.25 inches square. The big cubes and other shapes found in cocktail bars are actually carved off huge, usually 300-pound ice blocks made in machines that create these blocks for ice sculptures. The machines look like horizontal freezers that are insulated on the inside. They have a cold plate on the bottom, and at the surface a water pump runs continually as the block freezes from the bottom up toward the top.
The resulting ice block is clear not because the water is filtered or boiled or anything like that, but because it freezes from the bottom to the top. When water freezes, its molecules form into a lattice that pushes away foreign matter such as bits of minerals and gases—anything except pure H2O. But in your typical ice cube tray at home, the water freezes from the top, bottom, and sides in toward the center. Typically, the center of the ice cube is cloudy for this reason—that is where the trapped air and any impurities and minerals get pushed. In the big block of ice, they’re pushed to the top as the water freezes, and the last bit of mineral-heavy water is drained rather than allowed to freeze and be cloudy.
The trick to making clear ice at home is to make the water freeze in one direction, but unlike in a sculpture machine, we can freeze it from the top-down (like a pond) rather than from bottom to top (as in sculpture block machines) or outside-in (as in a regular ice cube tray).
To Make Clear Ice in a Home Freezer:
- Fill an insulated, hard-sided cooler with regular tap water.
- Place it in the freezer *with the top off* so that the ice mostly freezes from the uninsulated top down toward the bottom.
- After anywhere from 24 hours to a few days, pull the cooler out of the freezer and remove the ice by tipping it upside-down and letting it slide out.
Typically, people use a hard-sided cooler that’s about 12” x 9” by 9” that takes up an awful lot of room in the freezer, competing for space with your leftovers. In theory you can use any insulated container, including a beverage thermos, but then it’s nearly impossible to remove the ice from it as the neck is smaller than the body.
The water freezes from the top-down, and depending on freezer temperature settings it can take two to four days to freeze solid. However, you probably don’t want to let it freeze all the way. Remember that the top part of the ice is the clear part, but the gases and minerals in the water are getting pushed down toward the bottom of the cooler. If you let the water in the cooler freeze completely, the top 75% or so will come out clear, but the remaining ice on the bottom will be super cloudy. Also, the water expands as it turns into ice, so if you let the cooler freeze solid, over time it will crack at the bottom.
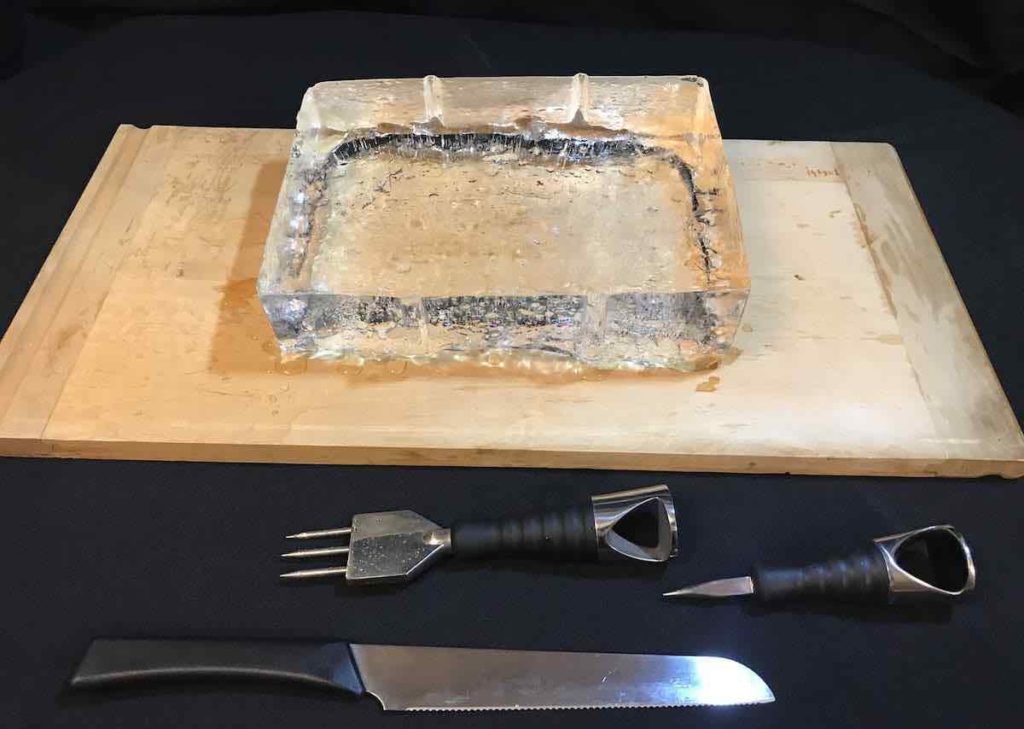
After you remove the cooler from the freezer, turn it over and let the ice slowly slip out. You’ll either have a clear slab of ice that’s a few inches thick (if you let it freeze for a day or two), or a block with a cloudy bottom (if it goes longer). Now you just need to cut this slab/block into your desired shapes for your drinks.
Problem solving: If your ice is fairly cloudy or contains air bubbles even in the upper part of the block, often the problem is that you (or family members in search of ice cream) are jostling the cooler by repeated opening and slamming shut of the freezer door. Another reason you get cloudy bits is if the freezer is set at such a cold temperature that the water freezes fast and the ice traps gases and impurities rather than pushing them away. See if you can raise your freezer temperature while still maintaining a food-safe temperature.
Cutting Up an Ice Slab or Block
You can cut up an ice block with any number of specialty tools such as Japanese ice saws, but they’re probably overkill for home use. An ice pick is ideal for removing the cloudy bottom of the block if you left it that long: Just hack away at it to remove the cloudy part. (A three-prong ice pick seems to work best.)
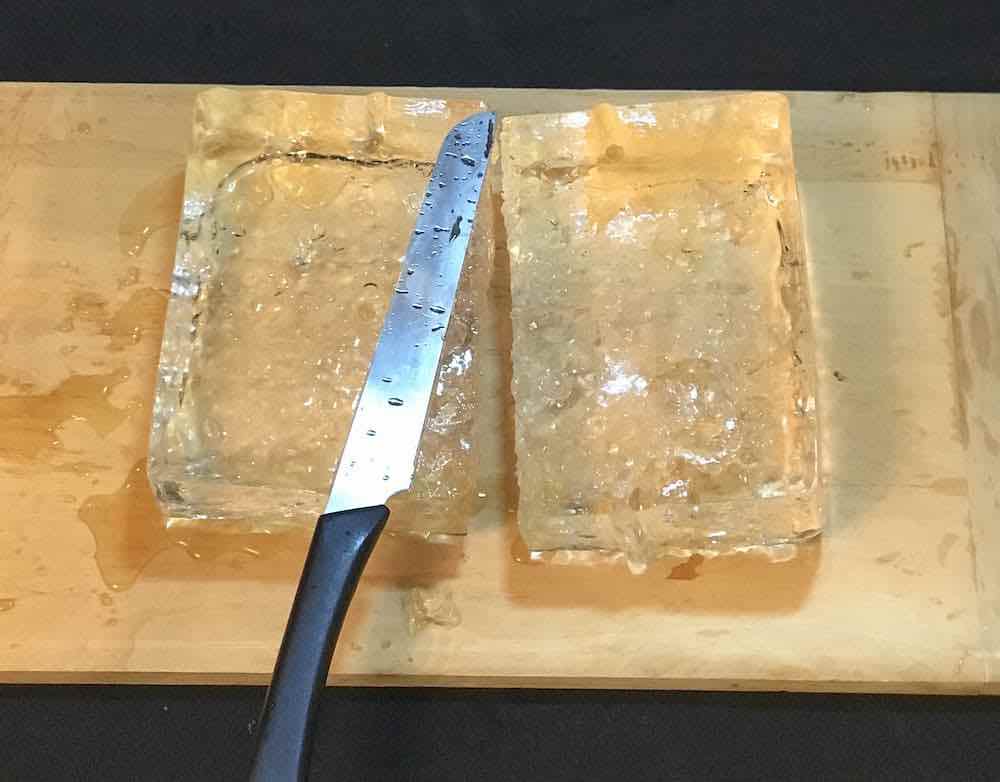
You can also use an ice pick to cut a slab into cubes. Lay the slab on a cutting board, and leave it sitting out long enough (typically 20+ minutes) so that the block is completely see-through, rather than foggy. This is called letting it temper, and it allows for cutting straighter lines. Ice right from the freezer will often shatter instead.
Next, score a straight line across the middle of the slab of ice with your ice pick or a big knife with a flat blade (such as a bread knife). Then either stab the ice pick into the center of the line, or lay your knife along the groove, and whack it with a muddler, wooden mallet, or other hard object. The ice should split along the line.
If the block is quite thick, you can score lines down the side and bottom as well to encourage it to split evenly. Thinner slabs cut more easily than thicker ones.
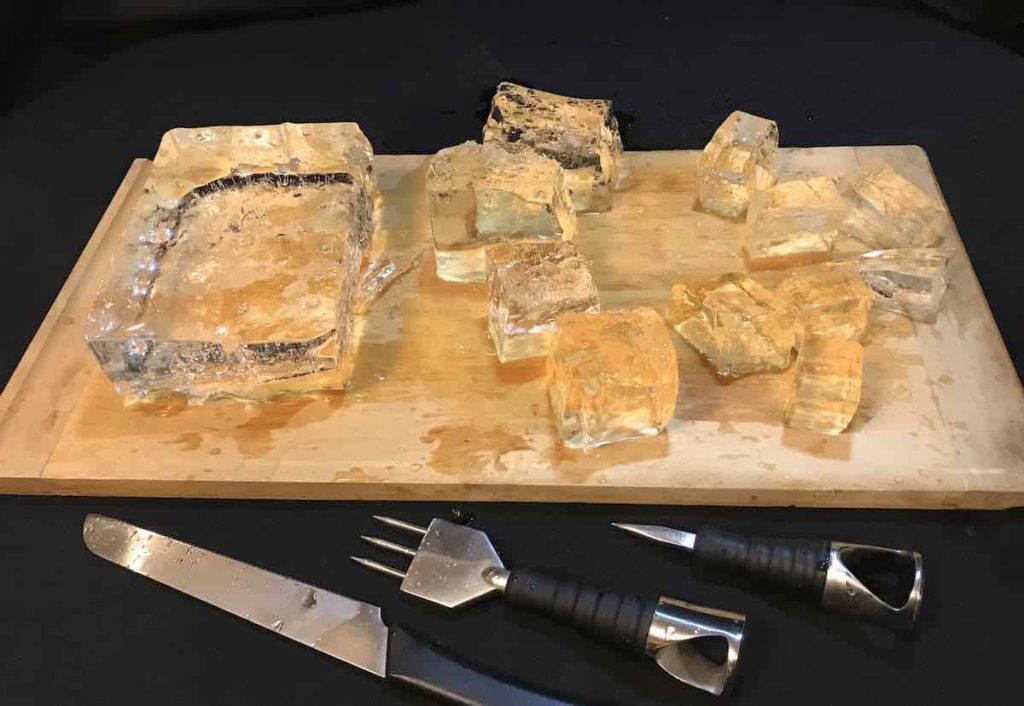
It is also easier to cut the slab in half and then half again each time, rather than trying to cut off cubes from a side. Now repeat the process of cutting the slab in half until you break it down into cubes. (If you stop early, you can make rectangular spears that you can use in your Collins glasses.)
This way you can cut crystal clear cubes to your desired size, whether that’s a giant cube or smaller ones. Some people hand-carve ice balls or diamond shapes from ice made in a cooler, but we’ll leave you to follow instructional YouTube videos for those advanced-level projects.
Further Ice-Related Reading
The process of forcing the ice to freeze in one direction has become known as “directional freezing,” and I am the person who pioneered the trick of using a cooler to do it back in 2009 after much experimentation. Since then, many people have invented clear ice cube trays that you can purchase, which take advantage of the same process. They usually take up slightly less space than a cooler but makes less ice per session.
At home, you can use the directional freezing technique to make ice balls using a thermos and some molds, to freeze objects like edible flowers into ice cubes or slabs, and to make small table displays such as a bottle frozen into a block. You can find all these techniques and more at this page on Alcademics.com.


